2D Fluid Simulation
This article shows how to create a basic real-time Navier-Stokes fluid simulation as well as how to incorporate viscosity, temperature, and vorticity into the algorithm. This is implemented on the GPU and is visualized using Unreal Engine.

Introduction
Motivated by the ease in which I was able to simulate water ripples and inspired by this video regarding multipass rendering in Unreal Engine, I set out to create my own Navier-Stokes incompressible fluid simulator. Unfortunately, this ended up being a much more difficult task as the equations involved are more complex than finding a simple average, and while there are many resources that go into great depth regarding these equations, they were usually far too dense and math-heavy for me to quickly understand their practical application. As such, this article primarily focuses on the implementation rather than the math in order to make understanding the algorithm easier for others experiencing the same difficulties I did. Alongside the previously mentioned video, these articles were also instrumental in helping me understand what to do. See this GPU Gems article for a more in-depth explanation of the math and algorithm involved.
The Algorithm
# "velocity", "temp", "density", "color", and "prevPressure" are clamped arrays/textures
# "v_iter" and "p_iter" are both unsigned integers
# "viscosity", "tempBuoyancy", "ambientTemp", "massScale", "vorticity", and "timeStep" are all floats
# note that, to use "uv" with textures for our GPU implementation, its domain becomes [0,1] and the vectors that are added to it must be divided by the resolution

def FluidSim( velocity, temp, density, color, prevPressure, v_iter, p_iter, timeStep, viscosity, tempBuoyancy, ambientTemp,  massScale, vorticity )

    # velocity advection
    velocity = advect(velocity, velocity, timeStep)
        # optional: viscosity iterations
        alpha = (velocity.resolution^2) / (viscosity * timeStep)
        for (v_iter < 50; v_iter++)
        velocity = jacobi(velocity, velocity, alpha, alpha + 4)
        # optional: add external forces
        velocity = addForces(velocity, temp, density, timeStep, tempBuoyancy, ambientTemp, massScale, vorticity)
        # optional: velocity border conditions
        velocity = borderConditions(velocity, -1)
    # calculate divergence
    div = divergence(velocity)
    # pressure iterations
    for (p_iter < 200; p_iter++)
    prevPressure = jacobi(prevPressure, div, -1, 4)
        # optional: pressure border conditions
        prevPressure = borderConditions(prevPressure, 1)
    # gradient subtraction
    velocity = gradientSubtraction(velocity, prevPressure)
    # color advection
    color = advect(velocity, color, timeStep)

    return velocity, prevPressure, color

def advect( velocity, advectTexture, timeStep )
    advected = [][]

    foreach uv in velocity
        vel = velocity[uv] * timeStep / velcity.resolution
        advected[uv] = advectTexture[uv - vel]

    return advected

def curl( vel, uv )
    return vel[uv + (0,1)].x - vel[uv - (0,1)].x + vel[uv - (1,0)].y - vel[uv + (1,0)].y

def addForces( velocity, temp, density, timeStep, tempBuoyancy, ambientTemp, massScale, vorticity )
    forces = [][]

    foreach uv in velocity
        # temperature
            t = up_vector * ((temp[uv] - ambientTemp) * tempBuoyancy - (massScale * density[uv]))
        # vorticity
            x = abs(curl(vel, uv - (0,1)) - abs(curl(vel, uv + (0,1))
            y = abs(curl(vel, uv + (1,0)) - abs(curl(vel, uv - (1,0))
            dir = vorticity * (x,y) / (length(x,y) + 1e-5)
            v = timeStep * dir * curl(vel, uv)
        # sum the forces
        forces[uv] = t + v

    return velocity + forces

def borderConditions( arr, scale )

    foreach uv in arr
        if (uv is on the border)
            arr = arr.closestNotOnBorder * scale

    return arr

def divergence( velocity )
    div = [][]

    foreach uv in velocity
        div[uv] = ((velocity[uv - (1,0)].x - velocity[uv + (1,0)].x) + (velocity[uv - (0,1)].y - velocity[uv + (0,1)].y)) / 2

    return div

def jacobi( x, b, alpha, beta )
    res = [][]

    foreach uv in x
        res[uv] = (x[uv - (1,0)] + x[uv + (1,0)] + x[uv - (0,1)] + x[uv + (0,1)] + alpha * b[uv]) / beta

    return res

def gradientSubtraction( velocity, pressure )
    gradient = [][]

    foreach uv in velocity
        x = pressure[uv - (1,0)] - pressure[uv + (1,0)]
        y = pressure[uv - (0,1)] - pressure[uv + (0,1)]
        gradient[uv] = (x,y) / 2

    return velocity - gradient
Algorithm Explanation
The basic idea behind this simulation it to continuously advect the fluid dye in the direction of the velocity - and given that velocities aren’t stationary, this means that we’re also advecting the velocity itself in the direction of the velocity. However, realistic fluids are more complex with pressure and temperature fields, which need to be dealt with in our simulation. As such, we need to use the Navier-Stokes equations to make sure our fluids properly act like fluids.


The Navier-Stokes equations only show how the velocity changes over time, which means we need to identify the velocity at a specific moment. Analytically solving these equations is beyond my capability and will not allow for simulating fluids in real-time, and so we are left iterating these equations to see how the fluid changes over time. However, doing so will introduce non-zero divergence to our equation, which needs to be dealt with. Using the Helmholtz-Hodge Decomposition Theorem, we can extract the divergence from the velocity field and then project it back to get a divergence-free velocity (see images on the right). As such, we can now specify the steps to our algorithm for each iteration:
Advect the velocity field
Apply viscous diffusion
Add any external forces
Project back to a divergence-free velocity field
Advect the fluid dye using the velocity field
1. Velocity Advection

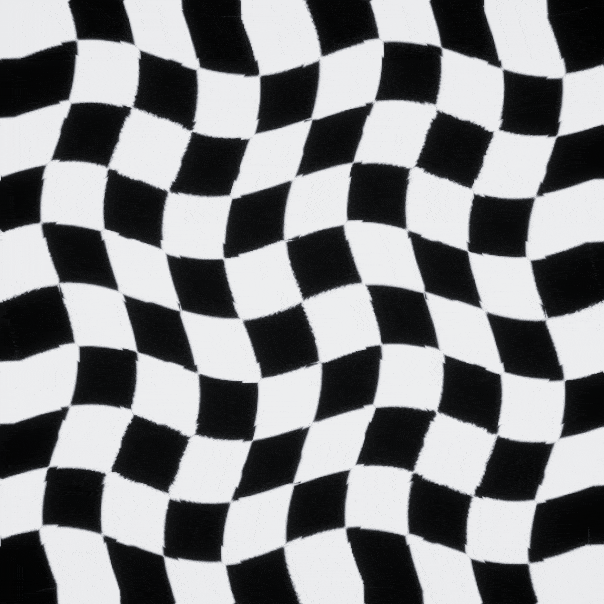
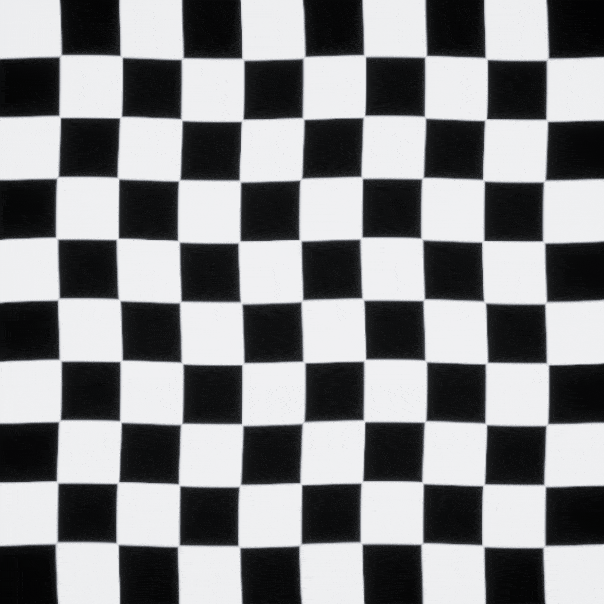
The intuitive method for performing advection is to take the position and move it along its velocity - a Lagrangian scheme. However, this will not work for a GPU implementation given that the GPU can only see pixel fragments rather than particle positions - the particle’s destination may end up between pixels, and we have no easy means of distribution. Furthermore, if we multiply the velocity by a time step, the method becomes more unstable the larger it gets. As such, our algorithm will implement a semi-Lagrangian scheme where we move backwards along the velocity, capturing the value at that point, then replace the current pixel fragment with it. Given that the backwards point will probably lie between pixels, bilinear interpolation is used to approximate the corresponding value (see the image on the right). Note that the projection step of our algorithm will fix the unnatural boundaries shown in the following animations. To implement this on the GPU, see the following code snippet (note that we divide by the texture’s resolution so that we stay within the bounds of the texture, given that the domain for texture coordinates is usually [0,1] and not [0, resolution]):
// Advection shader, saved to velocity texture ("tex" is the texture we want to advect)
    vec2 uv = TexCoords;
    float resolution = 512;    // can be anything
    vec2 vel = velocity[uv].xy * timeStep / resolution;
    FragColor = vec4(tex[uv - vel].xy, 0, 1);
Initial Velocity = sin(y)î + sin(x)ĵ

Initial Velocity = sin(x)î + sin(y)ĵ
2. Viscous Diffusion

This is the step where we specify the kinematic viscosity of the fluid, which is specified by v in the Navier-Stokes equations. As discussed in the GPU Gems article, viscous diffusion can be solved the same way as solving for Poisson pressure, which can be performed by many different methods. We will be using the Jacobi method, which is the simplest to implement but requires the most iterations (other methods will be explored in a future section). While the iterations traditionally start with an initial “guess” of 0, we can perform a slight optimization by starting with the resulting values of the previous simulation iteration given that the fluid’s state will not have significantly changed since then. As such, we will use the following Jacobi shader to implement viscous diffusion (note that we multiply by the square of resolution rather than divide in order to have better control over how viscosity visually affects the fluid, and that if “viscosity” is 0 then this step should be skipped):
// Jacobi iteration shader (50 iterations should be fine for viscous diffusion; saved to velocity texture)
//     Note that the vectors we're adding to "uv" should be divided by the resolution as its domain is [0,1]; this is omitted for the sake of readability
// Inputs:
//    X: velocity
//    B: velocity
//    Alpha: resolution^2 / (viscosity * timeStep)
//    Beta: alpha + 4
    vec2 uv = TexCoords;
    vec2 sumAdj = (X[uv + vec2(1,0)] + X[uv - vec2(1,0)] + X[uv + vec2(0,1)] + X[uv - vec2(0,1)]).xy;
    FragColor = vec4((sumAdj + alpha * B[uv].xy) / beta, 0, 1);
Viscosity: 5

Viscosity: 20
3. External Forces
While an optional step, this is where we can influence the velocity field with other forces, such as temperature and vorticity. For temperature, we create two additional scalar fields “temp” and “density” (which can both be saved in a single texture under different color channels) and three scalar constants “tempBuoyancy”, “ambientTemp”, and “massScale” (taken directly from the GPU Gems article). We can also specify a vector field for the “upVector”, although it is much more common to keep that a constant value. With regards to vorticity, I used the implementation described in this article given that GPU Gems was vague on the 2D case (its equation requires a cross product - which only works for 3D vectors - and does not explain how to specifically apply the algorithm in 2D). Applying both forces to our algorithm, we get the following GPU shader:
// Forces add shader (saved to velocity texture)
//     Note that the vectors we're adding to "uv" should be divided by the resolution as its domain is [0,1]; this is omitted for the sake of readability

    float curl(sampler2D vel, vec2 uv)
    {
        return vel[uv + vec2(0,1)].x - vel[uv - vec2(0,1)].x + vel[uv - vec2(1,0)].y - vel[uv + vec2(1,0)].y;
    }

    vec2 uv = TexCoords;
    vec2 upVector = vec2(0,1);

    // temperature buoyancy
    vec2 t = up_vector * ((temp[uv].x - ambientTemp) * tempBuoyancy - (massScale * density[uv].x));

    // vorticity
    vec2 x = abs(curl(velocity, uv - vec2(0,1)) - abs(curl(velocity, uv + vec2(0,1));
    vec2 y = abs(curl(velocity, uv + vec2(1,0)) - abs(curl(velocity, uv - vec2(1,0));
    vec2 dir = vorticity * vec2(x,y) / (length(vec2(x,y)) + 1e-5.);
    vec2 v = timeStep * dir * curl(velocity, uv);

    // add forces to velocity
    FragColor = vec4(velocity[uv].xy + t + v, 0, 1);
While optional, and given that fluids don't naturally flow in infinite or wrapped space, we would like to implement boundary conditions to simulate fluid within enclosed walls. As discussed in the GPU Gems article, this is accomplished by clamping the textures and creating a one-pixel “wall” around the fluid simulation where different logic is performed. One option is to implement basic no-slip conditions, which is done by simply setting the velocity on the border to 0. A slightly more complex but more preferable method would be to implement pure Neumann pressure boundary conditions, which is done by setting the velocity on the border to be negative the adjacent velocity, as well as setting the pressure to be equal to the adjacent pressure. While the boundary conditions for pressure occurs during the next step, we can implement both with a single shader by varying the input, as shown below:
// Boundary conditions shader (saved to velocity texture)
//     Note that the vectors we're adding to "uv" should be divided by the resolution as its domain is [0,1]; this is omitted for the sake of readability
// Input:
//    tex: velocity
//    scale: -1

    vec2 uv = TexCoords;
    float res = 512;    // Can be anything
    ivec2 pixel = uv * res;
    vec2 adjacent;

    if (pixel.x == 0)
        FragColor = vec4(tex[uv + vec2(1,0)].xy * scale, 0, 1);
    else if (pixel.y == 0)
        FragColor = vec4(tex[uv + vec2(0,1)].xy * scale, 0, 1);
    else if (pixel.x >= res-1)
        FragColor = vec4(tex[uv - vec2(1,0)].xy * scale, 0, 1);
    else if (pixel.y >= res-1)
        FragColor = vec4(tex[uv - vec2(0,1)].xy * scale, 0, 1);
    else
        FragColor = vec4(tex[uv].xy, 0, 1);
Temp - AmbientTemp: 0.1, TempBuoyancy: 0.2
Vorticity: 2

Density * MassScale: 0.05

Vorticity: 10
4. Projection
This is the step where we project back to our divergence-free velocity field so our fluid behaves naturally, which is divided in three steps (see the GPU Gems article for more details):

Extracting the velocity field’s divergence: this can simply be done by adding the difference between adjacent velocities (see the divergence equation).
Solve the pressure equations: these are solved in the same way as viscous diffusion, except the inputs to the Jacobi shader are different.
Subtract the pressure gradient from the velocity: this can simply be done by subtracting adjacent velocities (see the gradient equation).
Applying this projection to our algorithm, we get much more fluid-like animations. The following shaders show how this is accomplished (note that I set e to 1 because I couldn’t get the fluid simulation working with e = 1/resolution, which is probably due to an error either in my implementation or my understanding):
// Note that the vectors we're adding to "uv" should be divided by the resolution as its domain is [0,1]; this is omitted for the sake of readability

    // Divergence shader (saved to divergence texture)
        vec2 uv = TexCoords;
        FragColor = vec4(((velocity[uv - (1,0)].x - velocity[uv + (1,0)].x) + (velocity[uv - (0,1)].y - velocity[uv + (0,1)].y)) / 2, 0, 1);


    // Jacobi iteration shader (200 iterations should be fine for poisson pressure; saved to pressure texture)
    // Inputs:
    //    X: pressure
    //    B: divergence
    //    Alpha: -1
    //    Beta: 4
        vec2 uv = TexCoords;
        vec2 sumAdj = (X[uv + vec2(1,0)] + X[uv - vec2(1,0)] + X[uv + vec2(0,1)] + X[uv - vec2(0,1)]).xy;
        FragColor = vec4((sumAdj + alpha * B[uv].xy) / beta, 0, 1);


    // Boundary conditions shader (saved to pressure texture)
    // Input:
    //    tex: pressure
    //    scale: 1
        vec2 uv = TexCoords;
        float res = 512;    // Can be anything
        ivec2 pixel = uv * res;
        vec2 adjacent;

        if (pixel.x == 0)
            FragColor = vec4(tex[uv + vec2(1,0)].xy * scale, 0, 1);
        else if (pixel.y == 0)
            FragColor = vec4(tex[uv + vec2(0,1)].xy * scale, 0, 1);
        else if (pixel.x >= res-1)
            FragColor = vec4(tex[uv - vec2(1,0)].xy * scale, 0, 1);
        else if (pixel.y >= res-1)
            FragColor = vec4(tex[uv - vec2(0,1)].xy * scale, 0, 1);
        else
            FragColor = vec4(tex[uv].xy, 0, 1);


    // Gradient subtraction shader (saved to velocity texture)
        vec2 uv = TexCoords;
        float x = pressure[uv - (1,0)] - pressure[uv + (1,0)];
        float y = pressure[uv - (0,1)] - pressure[uv + (0,1)];
        FragColor = vec4(velocity[uv] - vec2(x,y) / 2, 0, 1);
Initial Velocity = sin(y)î + sin(x)ĵ

Viscosity: 5

Temp - AmbientTemp: 0.1, TempBuoyancy: 0.2

Vorticity: 2

Initial Velocity = sin(x)î + sin(y)ĵ
Viscosity: 20

Density * MassScale: 0.05

Vorticity: 10
5. Color Advection
This is the step where we advect the fluid itself, causing it to flow with respect to the velocity field. We will use the same shader as we did with the velocity advection step, except now we will input the colored fluid texture for “tex” (note that in the previous animations, a checkered black-and-white texture was used):
// Advection shader, saved to color texture ("tex" is the texture we want to advect)
    vec2 uv = TexCoords;
    float resolution = 512;    // can be anything
    vec2 vel = velocity[uv].xy * timeStep / resolution;
    FragColor = vec4(tex[uv - vel].xy, 0, 1);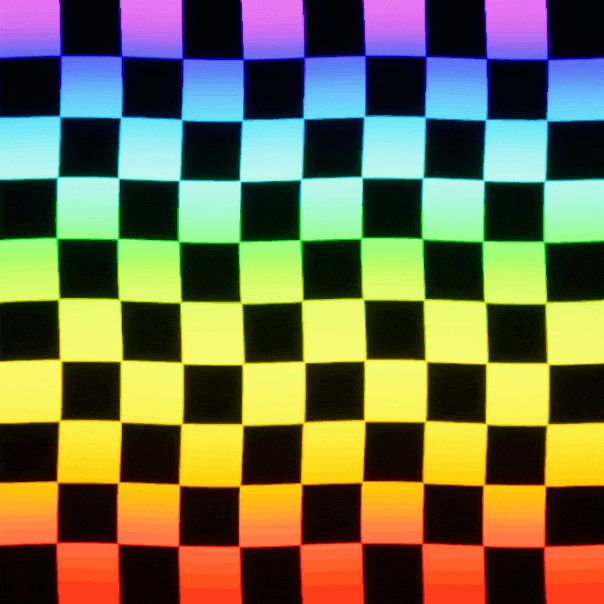
Initial Velocity = sin(y)î + sin(x)ĵ

Initial Velocity = sin(x)î + sin(y)ĵ
Unreal Engine Implementation
I used the screenshots from this video as a starting place for my implementation before moving on to the GPU Gems article to implement more features. For some reason I struggled with setting “e” to 1/resolution (“rdx” in the GPU Gems pseudocode), which is still unsolved to this day. I used the demos in this article to confirm that my animations were correct, so it seems like my implementation doesn’t need “e” to be set to 1/resolution. Each texture mentioned above had its own render target, and for each shader mentioned above there was a unique material accomplishing the same goal, which were organized via the following blueprint functions:


Note that Unreal Engine can’t save to a render target when it is being used as input (well, it can - but will produce undesirable results), so these functions are organized in a way so that pingponging can occur more efficiently. For example, the AdvectVelocity function starts with RT_Velocity and saves to RT_AdvectedVelocity. The next function, ViscosityIteration, takes RT_AdvectedVelocity and saves to RT_Velocity. The next function, AddForces, saves to RT_AdvectedVelocity. Finally, in AdvectColor, we end by saving back to RT_Velocity. This way, we don’t need to perform extra operations using temporary textures to save back to the input render target. There’s still room to make this system more efficient, but I left it as is for the sake of readability. Note that some functions require a “Scratch RT” as input, which is used as a temporary texture.
Mouse Input
Working off of the mouse input used for my water ripples, I modified it so that whenever the user clicks the mouse it adds both velocity and color to their respective textures. See the following animations:

No Mouse Color, Vorticity: 0

Mouse Color, Vorticity: 0

No Mouse Color, Vorticity: 2

Mouse Color, Vorticity: 2
Obstacles
In addition to mouse input, I wanted to be able to simulate fluid movement with obstacles in the way, as what might occur in natural fluids. Thankfully, the algorithm used for boundary conditions can be extended to obstacles as well, with the idea being to replicate those same conditions in areas where obstacles intersect the fluid. This is implemented by placing a scene capture right above the fluid and storing the scene depth into a texture via a post processing material (thus identifying the intersection of any solid object with the fluid plane, as those objects will appear closer to the scene capture than the fluid plane), with the result shown in the following animations:

Fluid movement without obstacle

Fluid movement with obstacle
The following screenshots show how the border conditions material was modified to incorporate obstacle collisions: the first three images show the original material, with the final two showing what was added. The “Mask out Pixel Border” section, which is divided between the first two images, creates a one-pixel black border (value of zero) which serves as a mask to set the border of the source material (either the velocity or pressure materials) to zero. The “Offset UVs by pixel offset at border” section creates a one-pixel border that is used to offset the texture coordinates to get the desired value from the source material (ie. the left border is set to (1,0), right border to (-1,0), bottom border to (0,1), and top border to (0,-1)), to which the “Only affect border” section uses to retrieve said desired values.
The obstacle collisions need to be handled a little differently given that they can be located anywhere with an arbitrary shape of intersection. The “Get average of adjacent values where there are no obstacles” section deals with this by taking the average of the non-obstacle adjacent values to the collision area (ie. we are only concerned with the adjacent values that are part of the fluid, not the adjacent values part of the obstacle), to which the resulting values are fed to the “Only affect area inside the obstacle” section. Finally, both the result from this section and the result from the “Only affect border” section are added back to the original source texture (not shown in the screenshots).


Using scene captures conveniently allows for simulating arbitrary moving objects as well, like the mannequin in the following animations. This can even be extended by getting an approximation of an object’s velocity by taking the gradient of the difference between its new and old collision areas (shown in the material screenshot after the animations), which can then be added to the velocity texture. However, while we are able to identify how far each object moves in the fluid (by taking the difference between the old and new collision areas), we are limited to capturing the velocity at the border between the collision and the non-collision areas (remember that the GPU can only see pixel fragments, and so it can’t tell the velocity of a pixel color if all the surrounding pixels are of the same color), which limits its realism. Luckily, an easy solution presents itself if there’s only one moving object: simply store the object’s velocity in the fluid simulation blueprints then pass it to the collision material to modify the direction of its movement (also shown in the material screenshot below). See the following animations to see how using the player’s velocity changes the simulation (note that, for the animation without player velocity, the effect is multiplied by 100 to make it more obvious):

Without player velocity

With player velocity
Note that the apparent “trails” of the collision velocity that appear in the collision texture (shown in the bottom-right of both animations) is only caused by gif compression and does not actually appear in the simulation. Also note that, in these animations, it seems like fluid is flowing from the collision areas of the cube and player, which is caused by the advection and projection (divergence, pressure, and gradient subtraction) shaders sampling their respective values from collision areas - thus practically causing a “source” of fluid. If desired, this can be eliminated by only sampling adjacent values if they are not in a collision area, using the value at the current pixel instead.
The following screenshot shows how the collision velocity is computed using the new and old collision areas, which is then saved into the old collision render target. The red channel stores the new collision area, and the blue and green channels store the collision velocities. The “Direction” parameter represents the velocity of the player, which is negated in order to make the fluid flow towards the player rather than away.
